Sound Talks
9000 Series Front Panel Fun!
Programming (A-9060DH/S, A-9120DH/S, A-9240SH)
One of our most popular support calls are regarding the programming of the 9000 series mixer amps. There are basically 2 ways to program this product, 1) with a laptop connected via the RS-232 input, or 2) from the front panel controls.
Using the front panel seems daunting but after doing it a few times you will quickly become accustomed to it. Let’s take a look at a simple setup from the front controls in MIXER mode with an A-9120DH, and a D-001T. We will design a system with Mic input on 1 and a CD player on input 2. These will be routed to 2 separate outputs. Here we go!
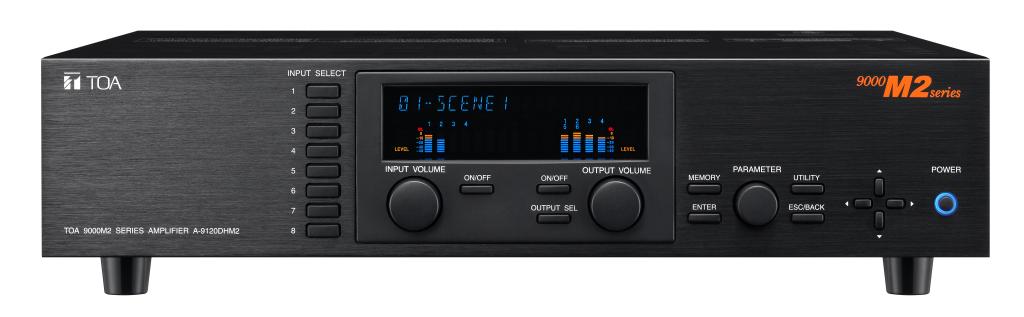
After powering up the unit, you are presented with the 01-SCENE1 screen:
Simply press the INPUT 1 button and you will see and we can now begin setting this input up as a MIC input. The arrows on the right hand side allow you to cycle through the various options within each “menu”. So, when we press the right arrow here we begin with the renaming option for that input. A simple turn of the PARAMETER knob changes the curser to letters or numbers. After we have named this input to MIC we will then press the DOWN arrow which brings us to the SENSITIVITY section. We will again turn the PARAMETER knob and adjust this to -54dB for the MIC sensitivity level. After continually pressing the DOWN arrow again and passing through other options for this input we will see a section that says MIC OUT1 0dB, the 0dB part will be flashing. This is where you route your inputs to your outputs. Turning the PARAMETER knob all the way to the left will bring this output to the INFINITY symbol and will turn it off. Turning it to the right will adjust your output level for that channel. (For this setup we will leave this OUTPUT channel off) Still within this section we can simply press the RIGHT arrow and now adjust OUTPUT2, which we will set at -10dB.
So far we have set INPUT1 (MIC) to go to OUTPUT channel 2 only.
The great thing about these sub menus is that we can jump to various INPUTS without losing the screen we are currently on. So, from here we can press the INPUT 2 button and work our way back through the menus for the CD player. All that we need to do is the same setup but this time for INPUT 2. Don’t forget we want this as a CD source so we will need to make sure that the SENSITIVITY section is set at -10dB. We also want this INPUT to only go to OUTPUT1 and we need to rename this to CD.
Again, a simple press of the DOWN arrow brings us back to through these sub menu’s.
After this has been done we will want to save this as a SCENE so the programming we just finished will not be lost. If we press the MEMORY button we are presented with the . If we turn the PARAMETER knob this will change LOAD to SAVE, ERASE, and P-ON. Selecting save will allow us to save this to any SCENE we wish.
We have now just set the MIC to go to OUTPUT2 only and the CD player to go to OUTPUT1 only.
It seems like a lot of work, but it really isn’t. Ideally the easiest way to program this is with the PC software. But, for those times where you are stuck, it is good to know that all the features you need are right at your fingertips.
Voila!
- Support
- Sound Talks
-
9000 Series Front Panel Fun!